Are you a comic artist? Wanting to sell the artwork you create is a pretty natural step, especially if you're signed up to do an Artist Alley at a convention. But how to get your work out there? One fun DIY approach is to create what's known as an ashcan comic!
This guide is by no means exhaustive, but I'm covering the basics and have links for further information at the bottom!
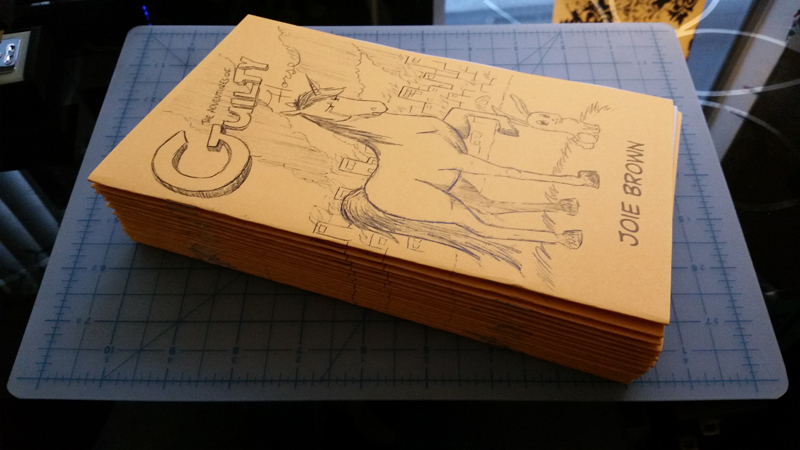
Guilty Horse, an ashcan I created out of a personal challenge to draw an entire comic in ballpoint pen only.
What's an Ashcan?
According to Wikipedia, the roots of ashcan comics lie in creating quick prints used solely for copyrights that weren't intended for distribution (eg, "goes straight to the incinerator"). Also known as "zines," nowadays they are essentially mini comics, typically measuring 8.5" x 5.5". This is the most useful for doing small print runs, creating a collectible, or especially when an artist doesn't have a ton of printing money.
While I have seen them come in several different sizes, professionally printed, or even full color, traditionally they are black and white and stapled (lovingly) by hand. Their subject matter can vary wildly, up to and including non-comic ashcans with more illustrative or abstract approaches. I've even seen small prose books done this way! Illustrators, this applies to you too-- this method can also be used to create an artist sketchbook.
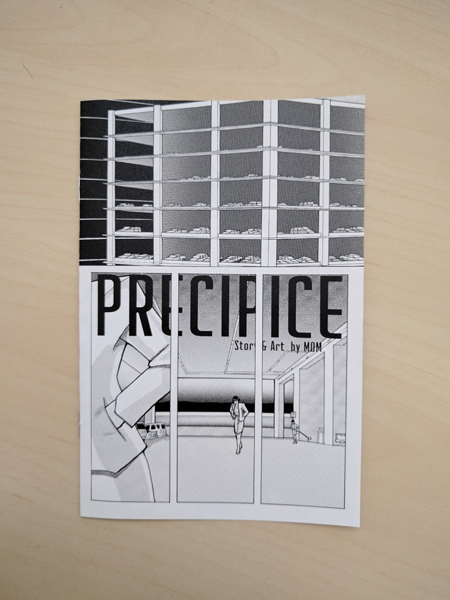
A fine example of an ashcan, Precipice, by Mom Comics! Check out the rest of her amazing work here!
Basically you can do whatever you want. Don't let anyone tell you how to live your life! I WON'T BE A PART OF YOUR SYSTE--. Ahem. Back to the topic at hand.
Prep Work: Getting Your Comic Printed
When you're done drawing, scanning, and otherwise creating your artwork, you've got to prep the files for printing. A nice perk of an ashcan is that you can print four pages per US standard 8.5" x 11" paper sheet. This means two comic pages per side, printed on both sides. The less actual pieces of paper you have to print on, the lower your costs! If you have a nice enough printer and paper at home, you can print your book right from your desk... but if that isn't possible for one reason or another, local printers (or places like Staples or Kinkos) tend to only charge around $0.10 per side of B&W printing.
Laying the book out can be the toughest part to get right, since you have to think in terms of a folded book and how those pages stack together. To print Guilty Horse, this is how I laid out my pages:
So the first two pages "12 & 1 and 2 & 11" are printed on the same sheet of paper flipped on the "short edge." This means that when the printer is finished printing page "12 & 1," it flips the paper over on the short side and prints "2 & 11" on the back. That makes sure that both pages are facing the same way, and that it'll all make sense when stacked together. This entire print job is only four pieces of paper!
Down ' n Dirty Printing Quick Guide:
-Make sure your files are at least 300 DPI, or your linework will be all fuzzy!
-Keep important parts of artwork and text away from the edges of your pages or they might get cut off on accident. A general rule of thumb is to leave at least 1/4" gutters all around (and in the middle where you'll be stapling, too!), and have your text even further in, just in case.
See you on the "flip side." Haha, printing jokes.
If you have the budget, one fun thing I like to do is get my cover printed separately on colored cardstock. Preferably neon, so it stands out! It also gives the ashcan a higher quality and durability.
I asked the FedEx dude for "the most retina burning cardstock they had."
Assembling the Comic
Now that you're all printed up, hopefully your pages make sense when stacked in order. When I want to make sure I've done it right, I pinch it gently in the middle and thumb through it to make sure.
Gently bend the pages in half to "score" the edges-- basically you're marking where you'll put your permanent fold later on. If you want a neater line, or if you have a ton of pages, you can also do a light indent with an x-acto blade.
Slightly scored papers gives you a good target for where to aim your staples!
You're gonna need a longarm stapler to get all the way to the center of the pages without bending them. If you don't have one, a friend (or your local library) might have one you can borrow. If you think you'll be doing a lot of these, I bought mine for $20 on Amazon (this is an affiliate link, if you buy the thing, I get a kickback. Yay!) Two staples ought to do ya!
Now we'll make your final fold-- use a flat edge to get it nice and crisp. I'm using a paddle used in applying screen tones, (another affiliate link!) but you could also use a butter knife or ruler. I just like the beveled edges of the tone paddle, as it won't put hard marks on the paper edges.
If you have lots of pages, you may notice that the edges of your papers begin to jut out. Not to fear though, this is fixable. You can use an X-acto to trim the extra paper off, and it'll boost the craftsmanship and quality of your book. Aren't you glad you didn't put your artwork too close to the edge, now?
Hooray, you've made your book! Now you just have to repeat the folding, stapling, and cutting about 50 more times to stock up. I recommend putting on your favorite music or podcast to help pass the time (cuz uh... this will take awhile...)
So that's that! With a bit of trial and error, soon your artist alley table will have an entire library of your comics. If you have made an ashcan, please feel free to show it to me in the comments below! I'd love to see it.
Additional Resources
More in depth information on creating your own ashcan: http://www.artofdawn.com/blog/how-to-make-an-ashcan-comic/
A guide to printing comics that I can't recommend enough (not an affiliate link)! https://ironcircus.com/shop/ebooks/72-let-s-print-a-comic-pdf-ebook.html


